Blog pages are static pages that are rarely updated and usually do not rank on search engines. So we will not be wasting a lot of time setting up required blog pages on your WordPress.
You are expected to create the average minimum required for anyone who comes to your blog to see that you take it seriously.
The required pages include About Us, Contact Us, Terms and Conditions, Privacy Policy, Refunds and Returns (if it is an e-commerce site), and Disclaimer page.
What you should do on each page.
About Us
This page contains details of what you do or what your blog is about. Keep it simple.
Contact Us
This page displays the various ways readers and visitors to your blog can contact you. It could be an email, phone number, or contact form. If using a contact form, I would recommend using Google Forms and embedding it on the page.
Terms and Conditions
This is a legal page that you might find difficult to construct. It contains details of the agreement between you and your readers/visitors as they use, read your blog, or take any advice you give. If you can afford a lawyer to create the text for this page, then do that.
But if you can’t, go here, create an account, and create the text for the pages you desire by answering the questions set up for each page creation. Copy the text and paste it to your desired page.
Privacy Policy
This is a legal page. It contains policies telling your readers what you do with the data you collect from them, be it their emails or phone numbers. Use the link above to create the text for this page if you cannot afford a lawyer to do it for you.
Refunds and Returns (for e-commerce sites)
This is also a legal page. If you sell physical items, it states your policy on how and whether you return and refund customers if there is a problem with your goods. Use the link above to also create the text for the page.
Disclaimer (optional)
On this page, you are expected to declare certain things about your blog. If you have affiliate links, please state them here. Alternatively, you can add a disclaimer text at the top of every post.
Also, you can use the link above to create the text for this page if you cannot afford a lawyer to do it for you.
To create a page;
- Go to the left sidebar of your admin and click on Pages → Add New Page.
This opens a blank page. Use the “Screen Options” to close any screen elements you do not want to see.
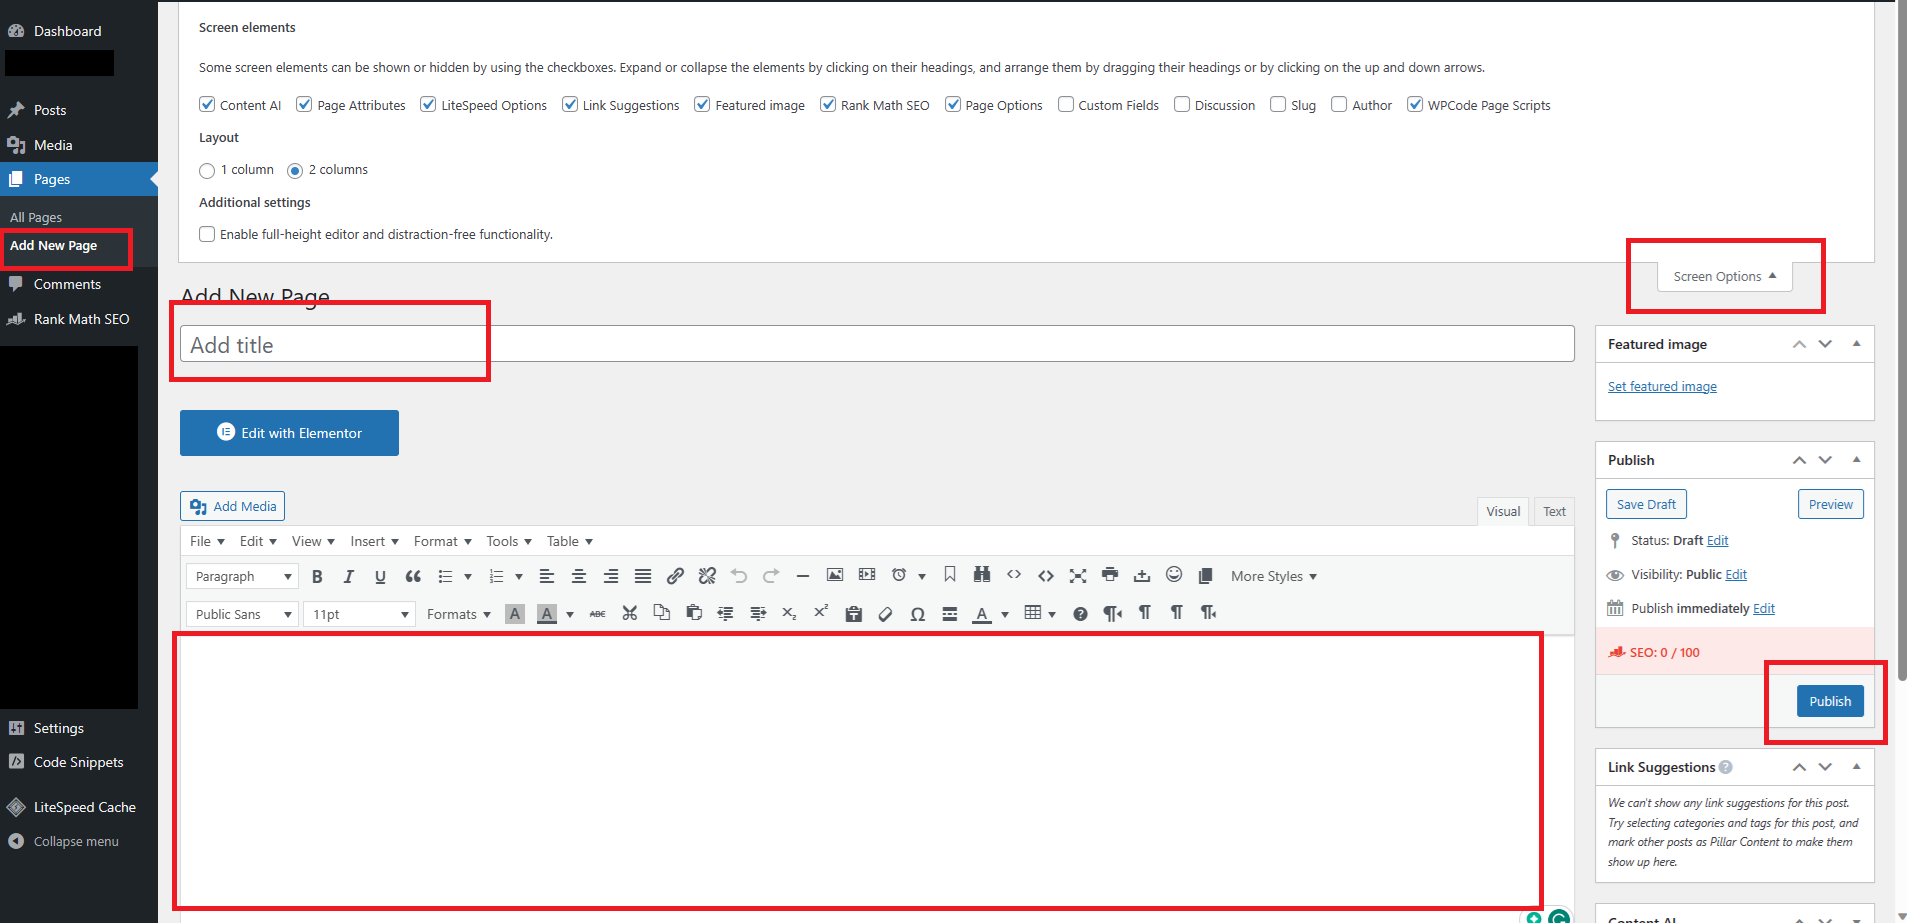
2. Add the page title, for example, “About Us“. This automatically creates a Permalink (https://goodlooks.com/about-us) for you. If your permalink is too long, you can edit it as you wish but ensure that your focus keyword is included.
- Note that, once published, you cannot change the extra text (about-us) included in your permalink anytime you wish. It could take you some time to find all the locations of the internal links linked to that particular page to avoid having 404 errors.

3. Write the page body. Notice the word count as you write. You can write as many as you wish.
4. Add media wherever you wish to have any and add your focus keyword in the Title and Alt Text of every image. DO NOT add FEATURED images for your pages. It doesn’t look nice.

- To add media, click the add media button at the top. Choose the media you wish to add or click the Upload files or Insert from URL to upload an image.
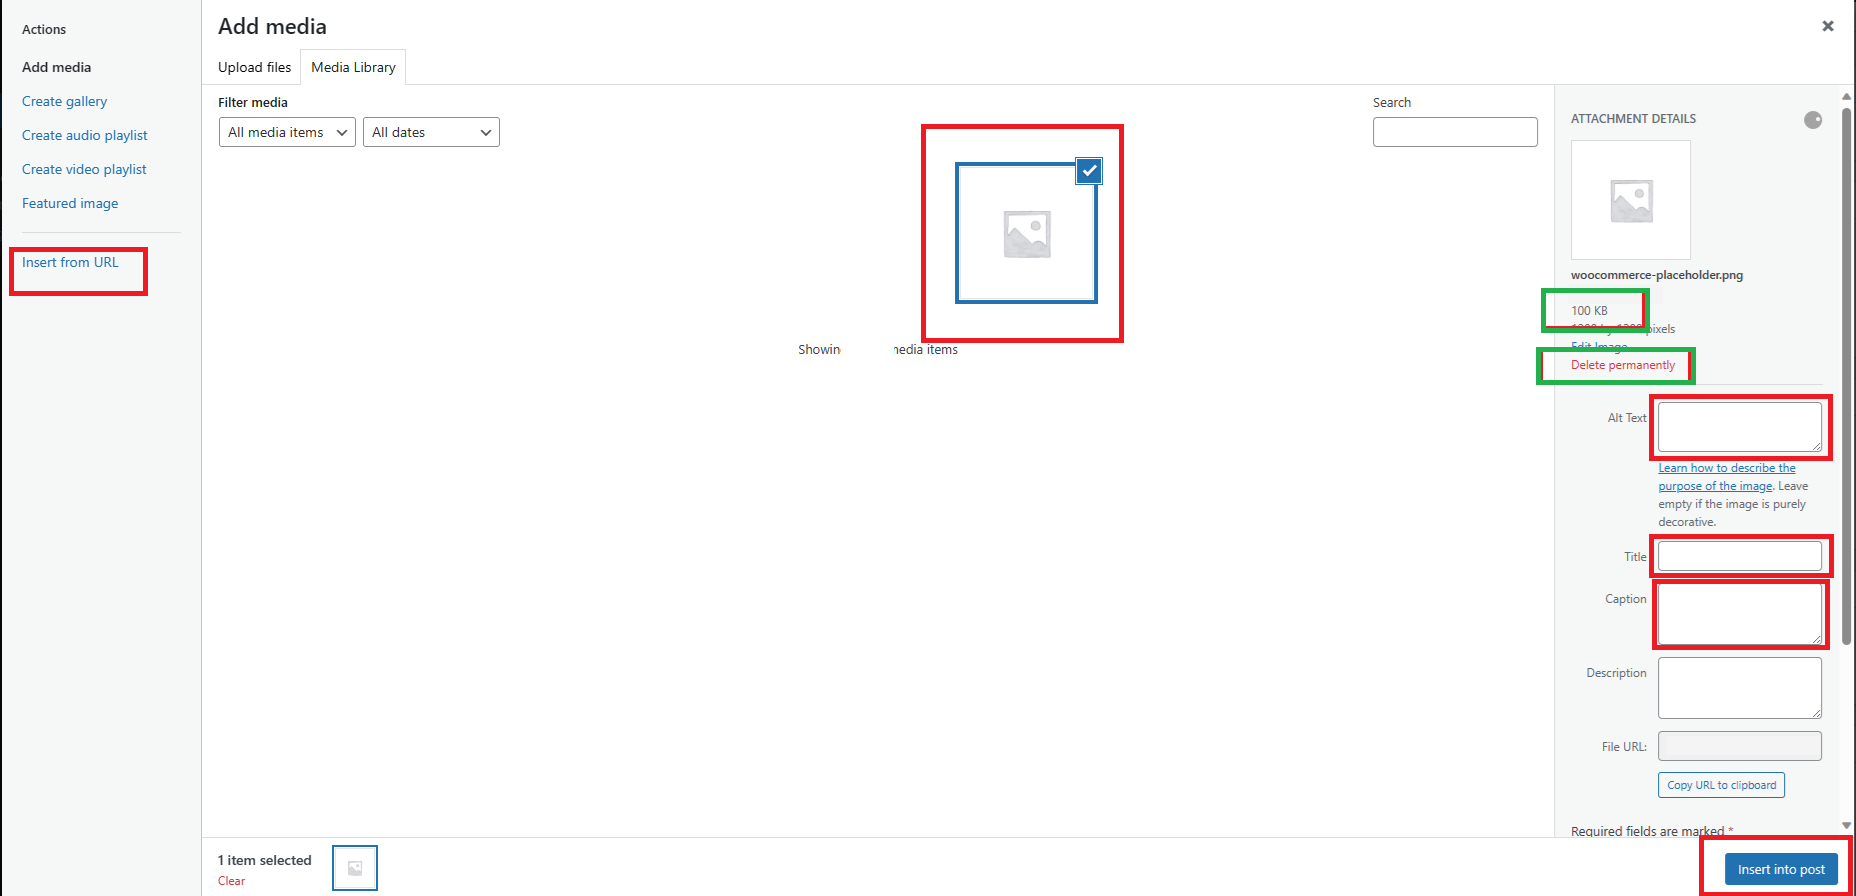
- After uploading the image, select the specific image you want to add to the post. On the right sidebar, add an Alt Text and Title. This is basically a description of the image. Ensure to add your focus keyword to it.
- Notice the image size is 100kb, ensure to keep your image size below 200kb. You can reduce your image size here.
- You can click on the delete permanently to remove a particular media from your storage.
- If you got the image from another website, use the proper attribution to accord the original owner of the image in the Alt Text and Title text.
- Adding a Caption is optional to you. Click Insert into post to add the image to your page.
5. Add internal and external links. Select the text you wish to add a link to, then click the link button as shown in the image above. Add the link and “apply” to save.
- Internal links are links connecting to published posts/pages on your blog.
- External links are links connecting to published posts on other people’s blogs.
- For internal links, I suggest that you link each page to the other.
- For external links, you can use your blog’s WhatsApp number (https://wa.me/+234**********). The “*” represents your number without the first “0” if you are Nigerian and the 234 represents your country code.
6. Click on the Rank Math SEO. Add a Focus Keyword, for example, “About Us“. This keyword should appear in different parts of the page. Follow the list below to assist you. As you complete the requirements, the colour turns from yellow to green and your score increases. Target getting an 81 score, but even if you can’t, do not worry yourself.
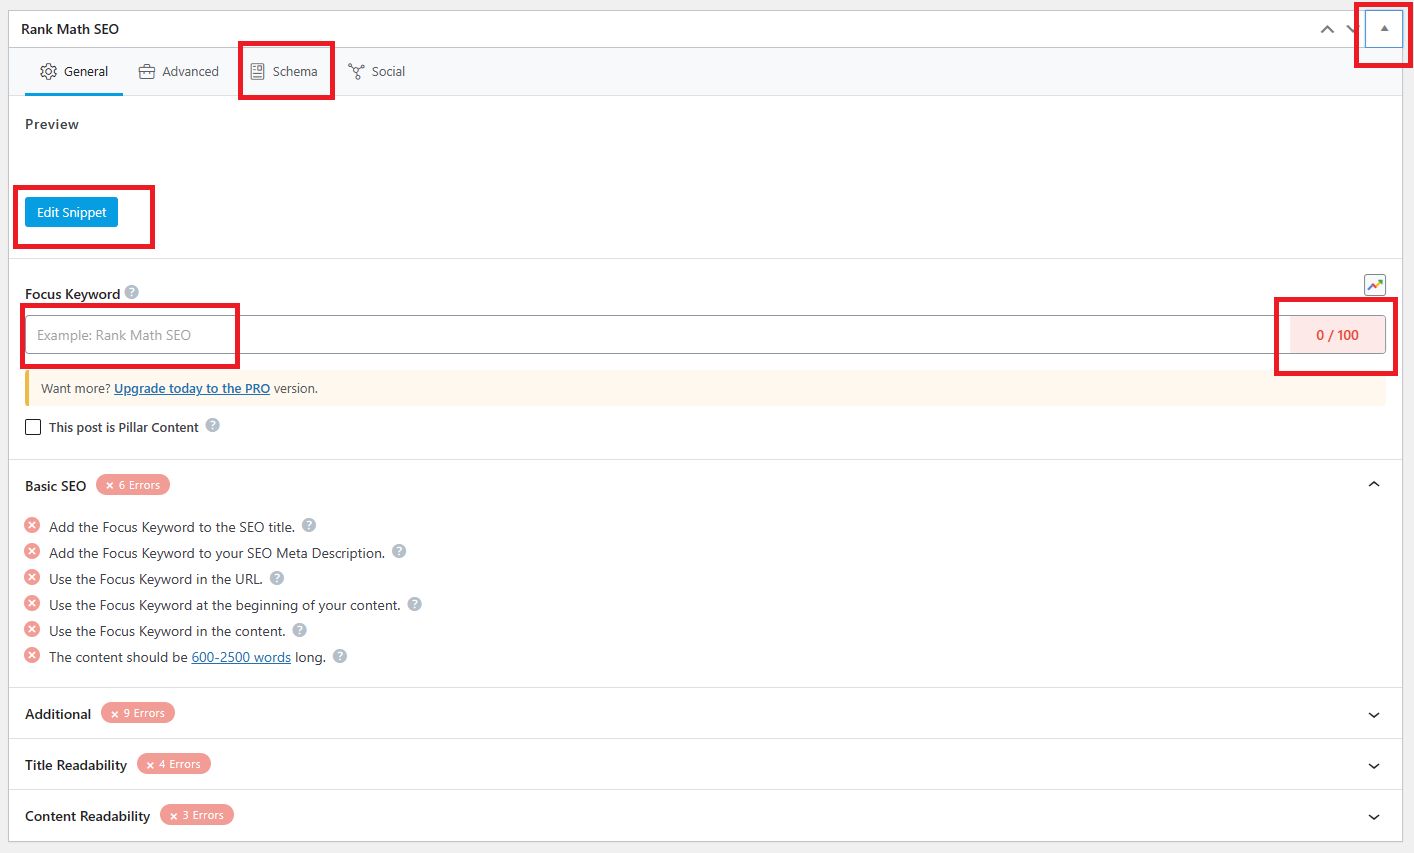
7. For “Edit Snippet“; this contains the text that appears below your title when you search for something on search engines. Be creative about it but ensure it contains your focus keyword.
8. Click on Schema to change the schema markup, if needed. This is basically how search engines understand your content type. A blog page will automatically have an “Article” schema markup. You do not need to change this.
9. Click “Publish” to make the page go live.
Do this for as many pages as you want to create.
***
Other Settings:
Congratulations on creating the relevant blog pages, now return to this post to complete the settings I wrote about there.
Also, go to Settings > Privacy. This is to add your Privacy policy page there and save.
***
Disclaimer: I do not have any affiliations with the domain name goodlooks.com. It was merely used for explanation purposes.
***
Now that you are done setting up the required blog pages on your WordPress, let’s go to the next steps.
Step 11: Creating Your First Blog Post.
Step 12: Submitting Your Blog to Search Engines.
Step 13: Setting Up Google Analytics for Your Blog.
***
Happy blogging…


