Setting Up Google Analytics for Your Blog.
Google Analytics helps you measure varying statistics like page views, scroll distance on a page, location of visitors, etc, on your blog. It’s basically to monitor traffic, traffic sources, and what your visitors do on your blog.
You will also learn how to link Google Search Console to Google Analytics.
If you already have a Google account connected to your blog, (not the one you shared on your contact page), then log into the Google Analytics home page.
- Click on Start measuring to create an analytics account.

2. Enter a New Account name. Preferably the name of your site.
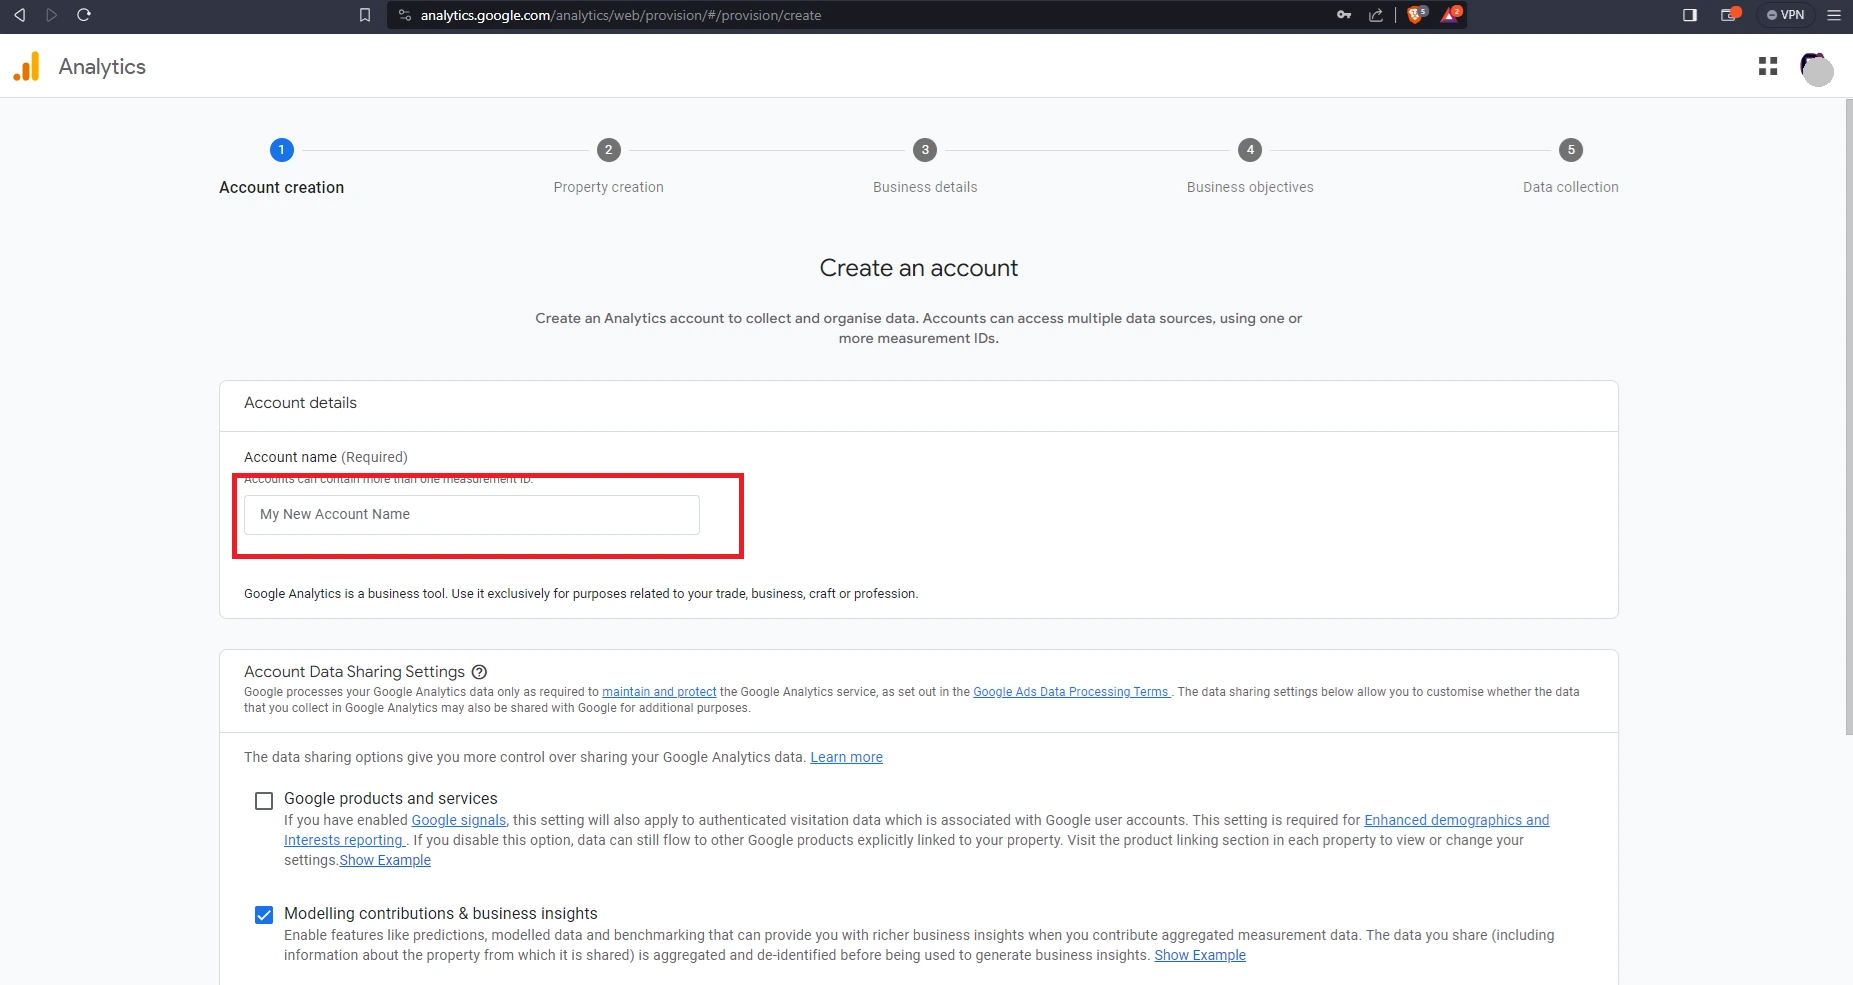
3. On the Account data sharing settings, tick the boxes you want. Click on Next at the bottom of the page.
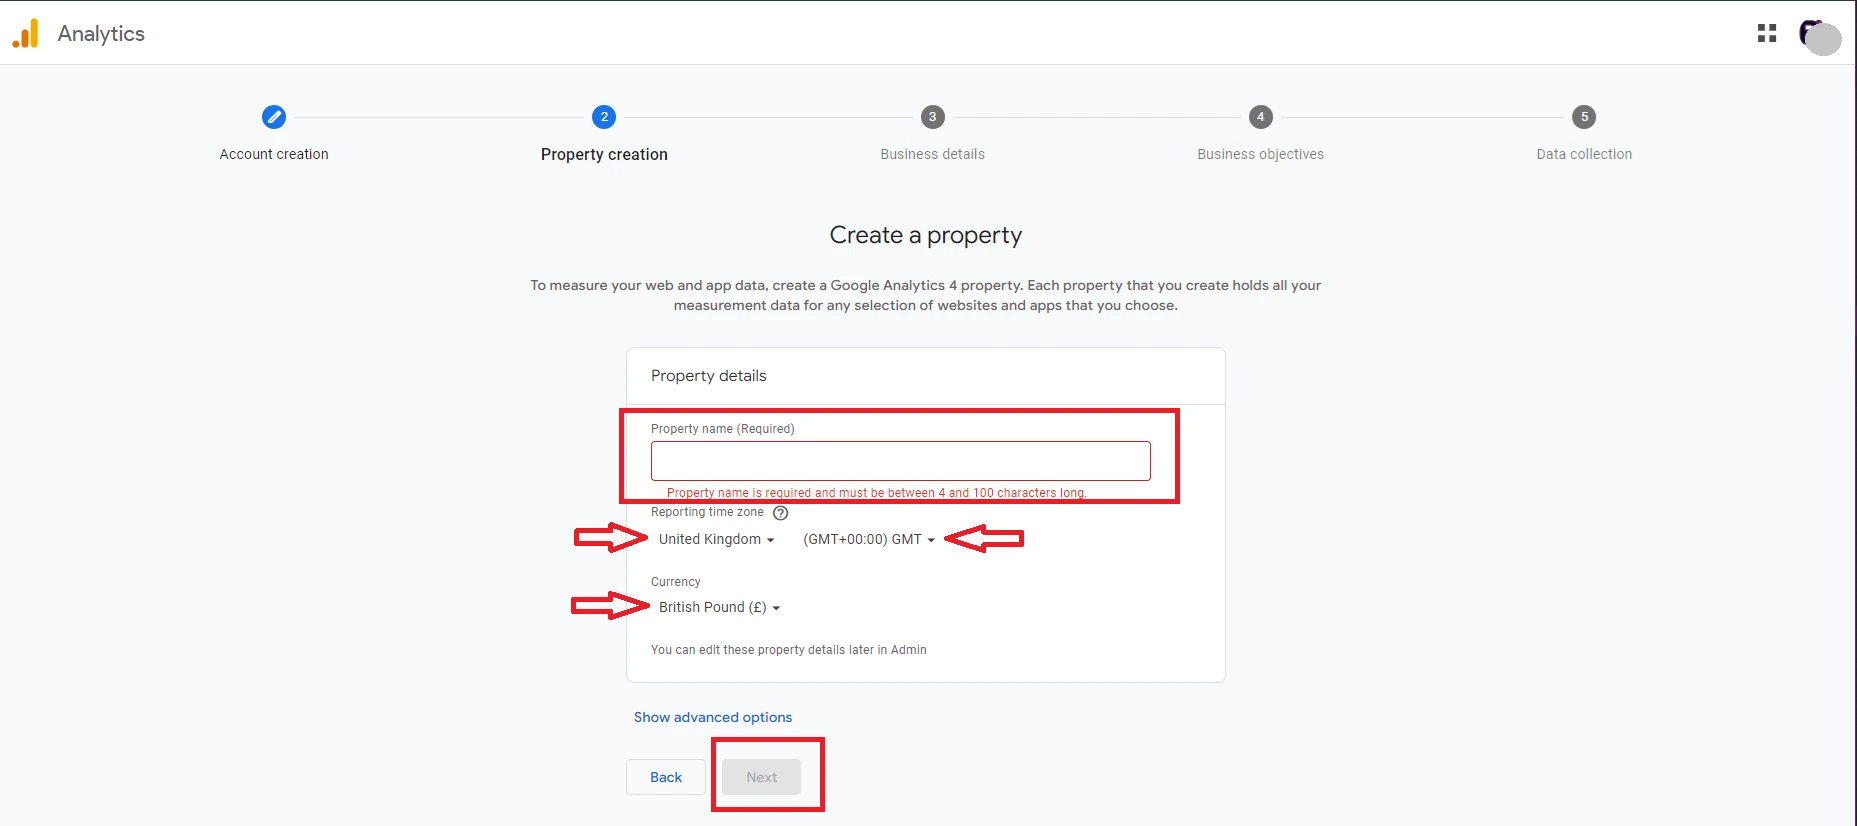
4. Add a Property name. Preferably the name of your site. Choose your time zone and Currency. Choose US Dollars if in Nigeria. Click on Next.
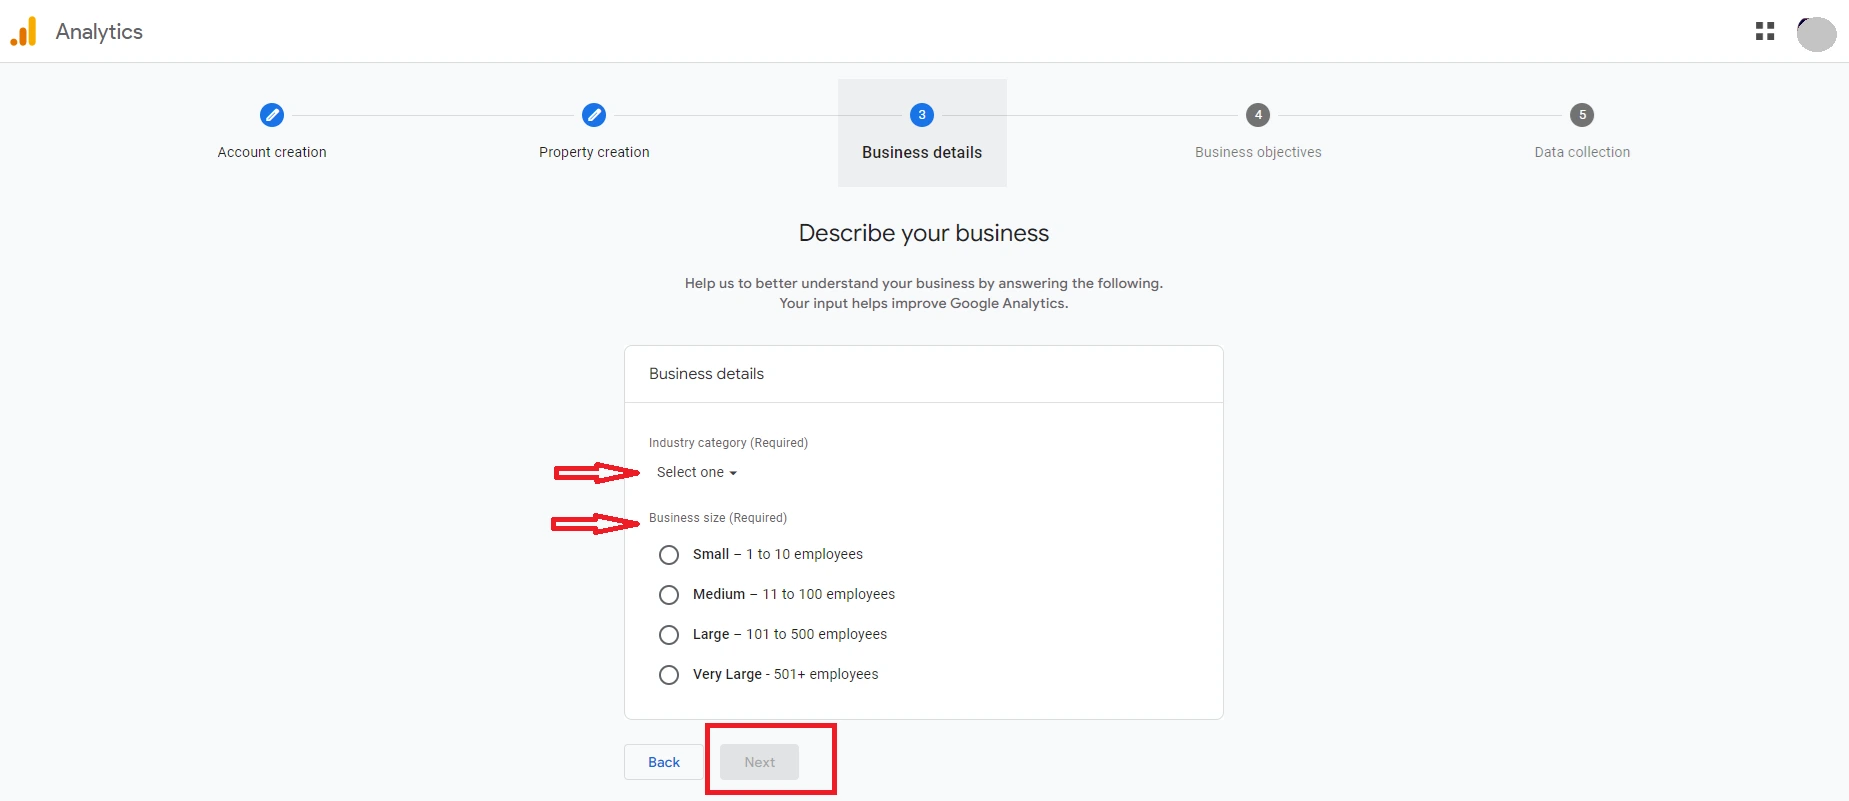
5. Select the blog/website category that applies to your blog. Select your Business size. Click on Next.
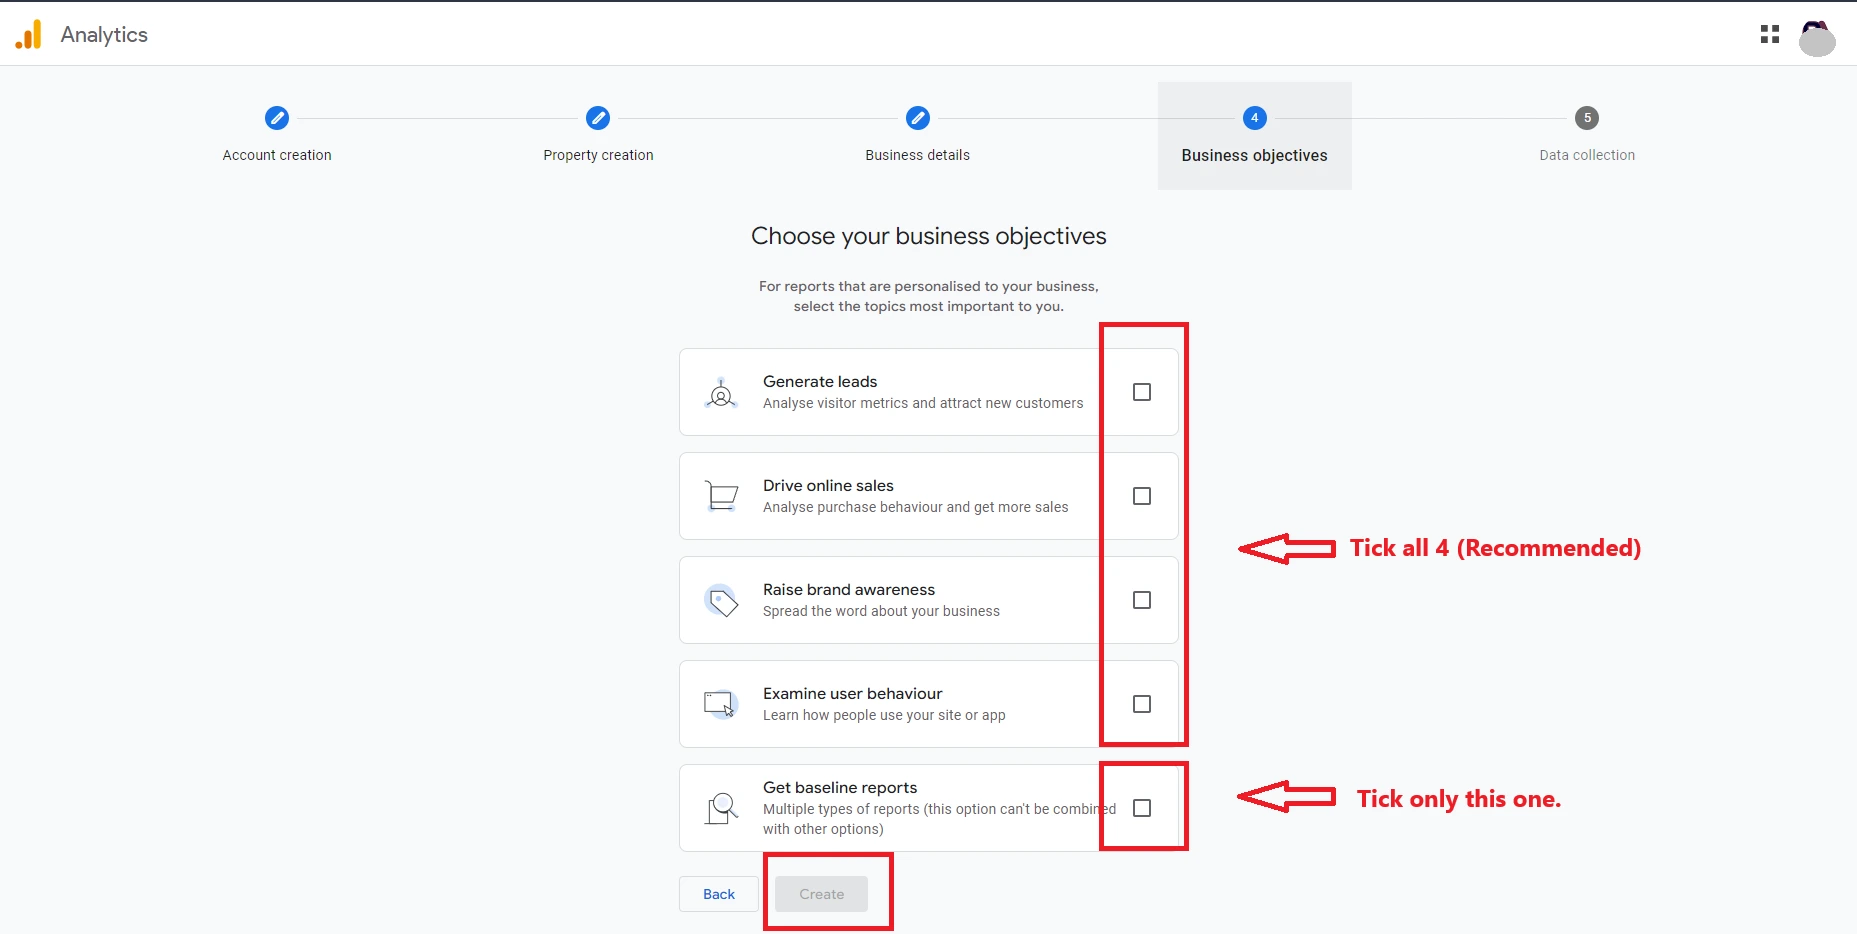
6. Select your business objectives. Click on Create.
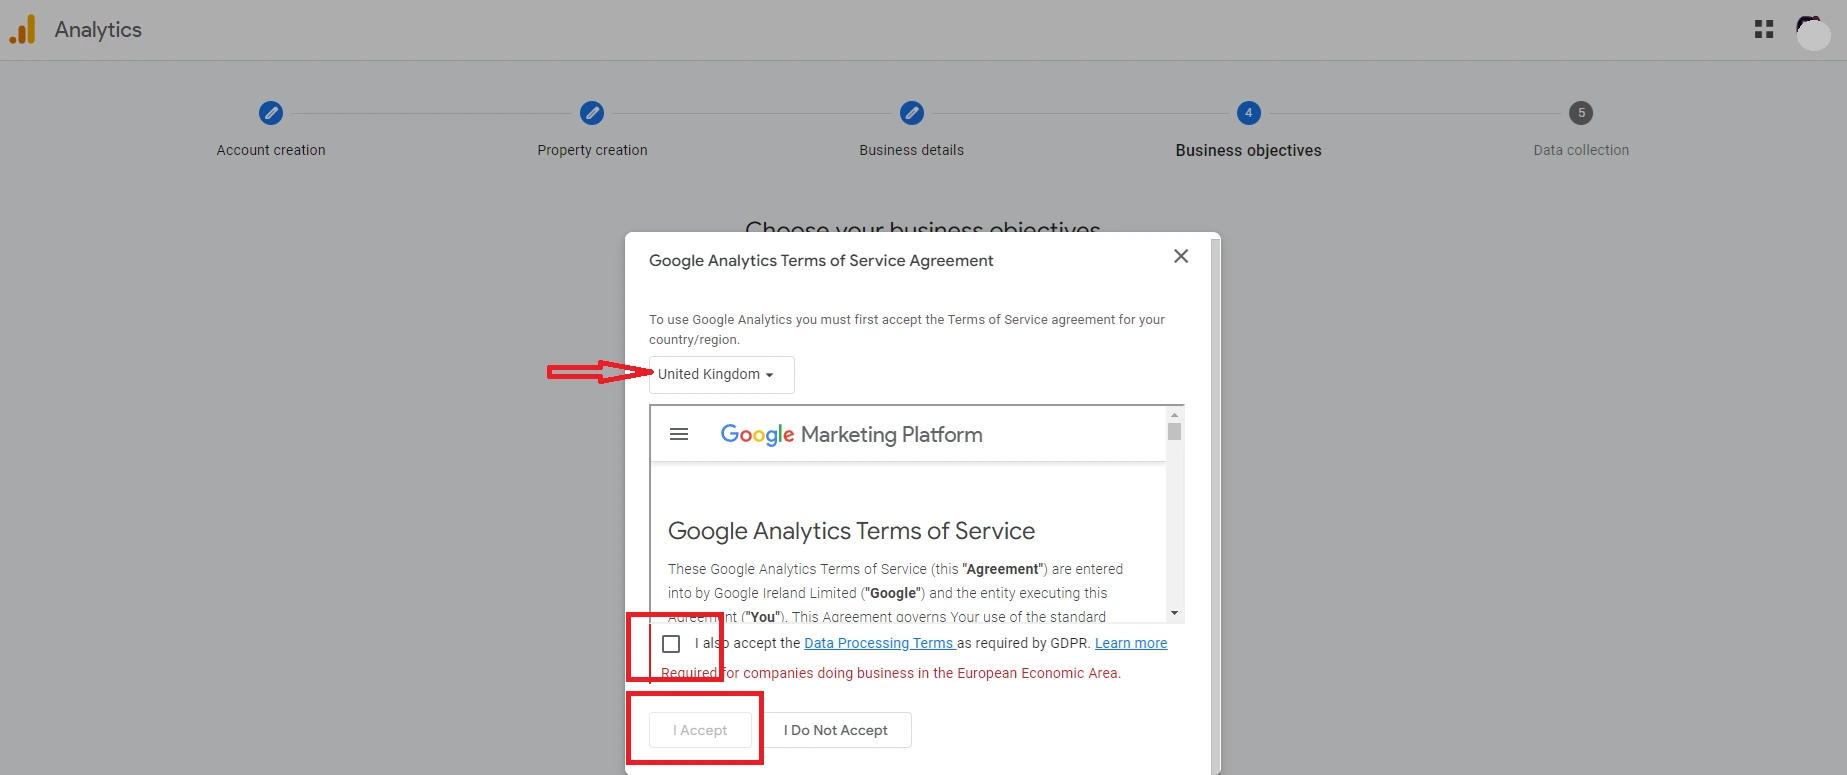
7. Select the Country that applies to you. Tick the box to accept the terms. Click on I Accept.
8. To start collecting data for your blog, select the Web platform.

9. Add your website URL and for the Stream name, use the name of your site. Click on Create stream.

10. Select the View tag instructions to create your web stream details.

11. Select the Install manually tab. Copy the set of codes shown.
12. Go to your WordPress Admin → Code Snippets → Headers & Footers. On the head section, click on the last letter/number/symbol of content within the box, and press enter on your keyboard to enter a new line. Paste the code you copied. Click Save.

13. Purge your cache plugin.
14. Go back to the Analytics page, and click on the Test button. An error message might come up. Do not worry about it. Give Google 24 – 48 hours to populate and begin to display data from your blog.
To see your Analytics page, log in to the analytics here. Go to the home page of the analytics account you created. You should see something like this.

Navigate to the Reports tab to see other parts of your page.
How to Link Google Search Console to Google Analytics.
Since we created the Search Console in our previous post, and it’s been 48 hours since creating the Analytics page, let’s link the two.
- To do this, go to the analytics home page. Click on the Admin (gear sign) at the bottom left corner of your screen.

2. When it opens, scroll to the bottom, Product links → Search Console Links.
3. On the page, click on Link to add.

4. Choose the Search Console Property. Select Choose Accounts. This will pick up the Search Console page.
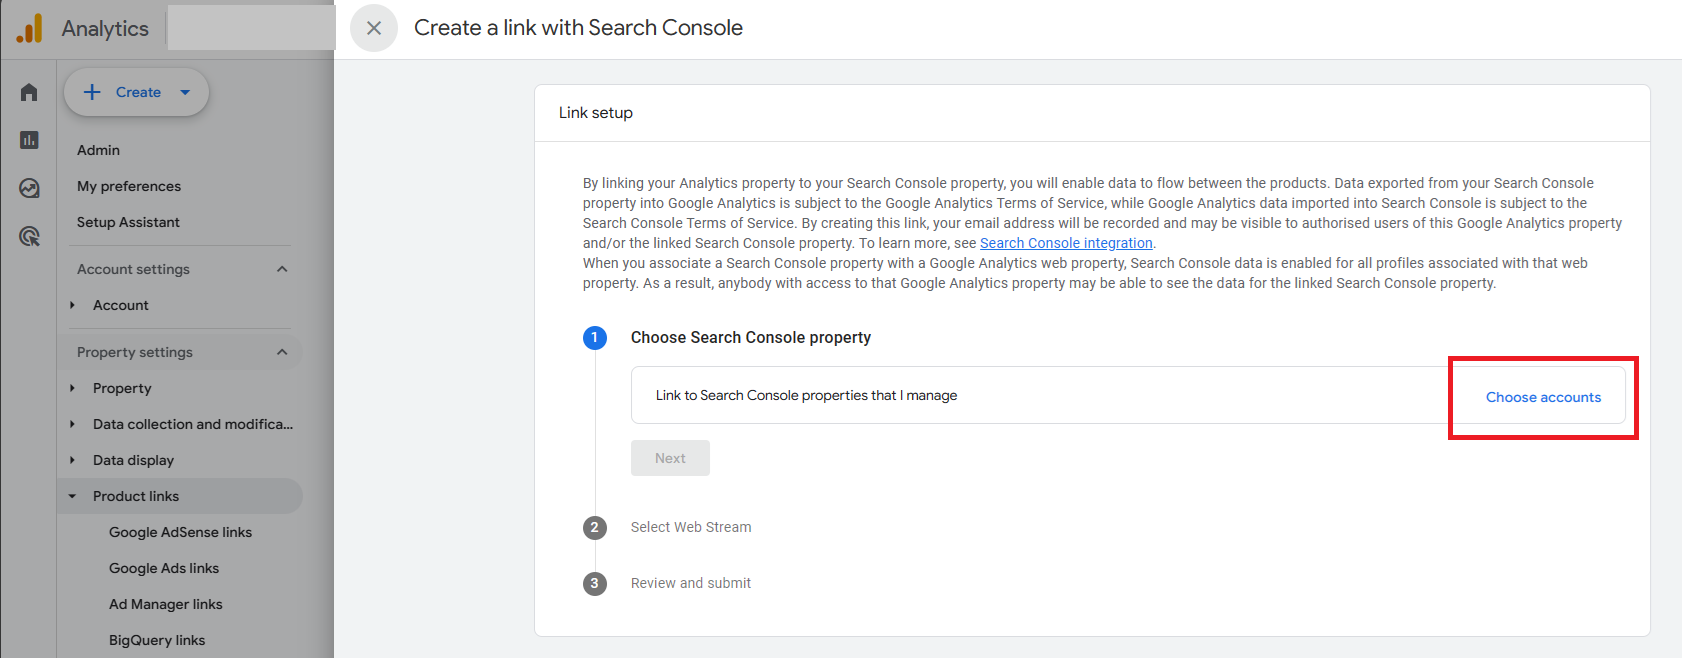
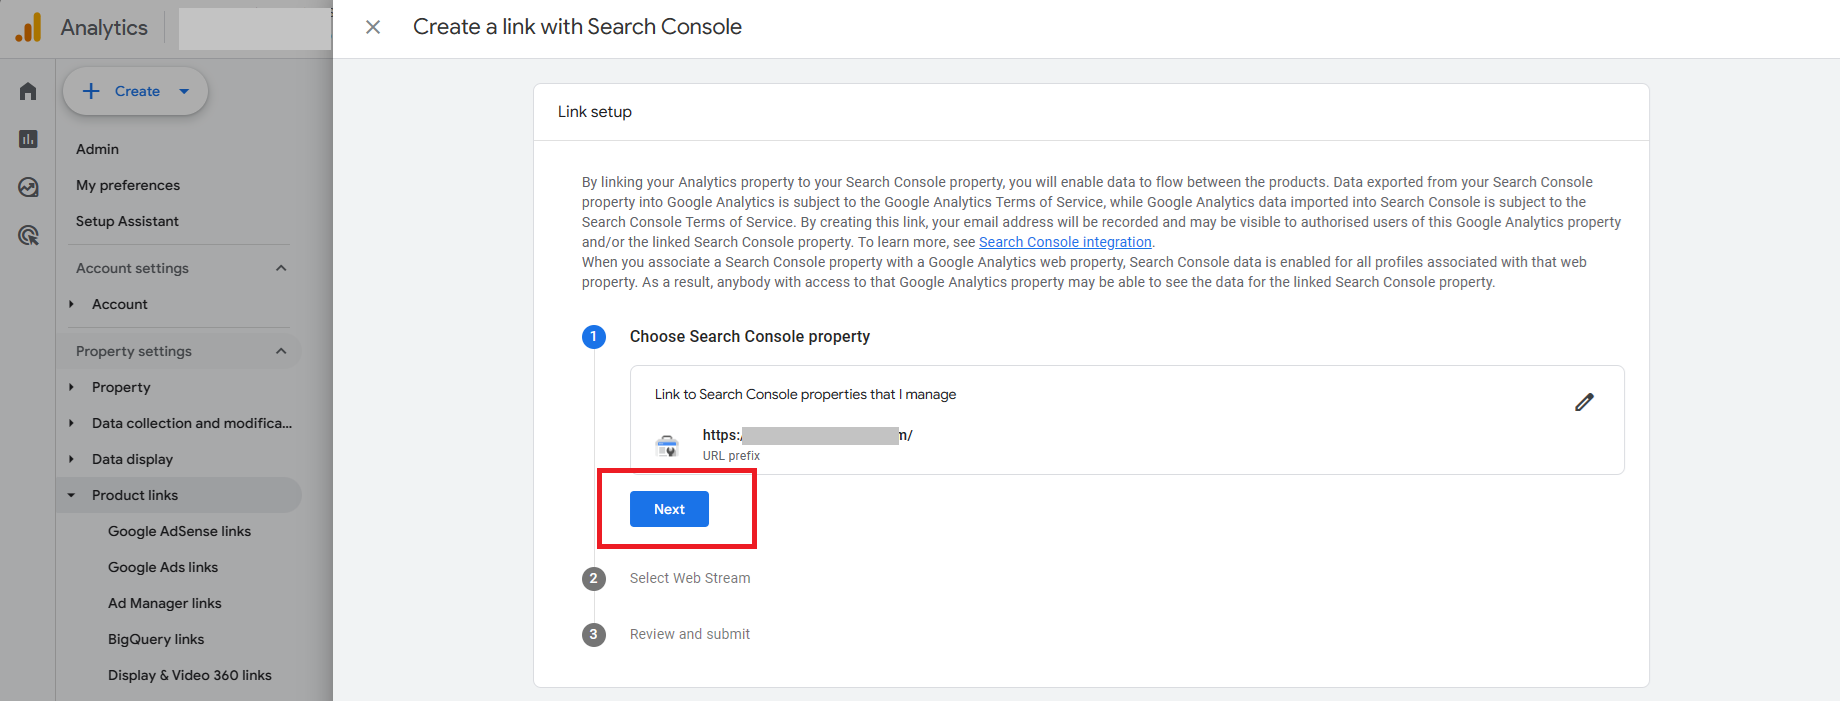
5. Select the property by checking the box. Ensure that the web address under the Property name is what you want to link to. Click Confirm to add.

6. You are done with step one. Click next to move to step two.
7. For step two, click on web stream select. This will pick up the Analytics page.
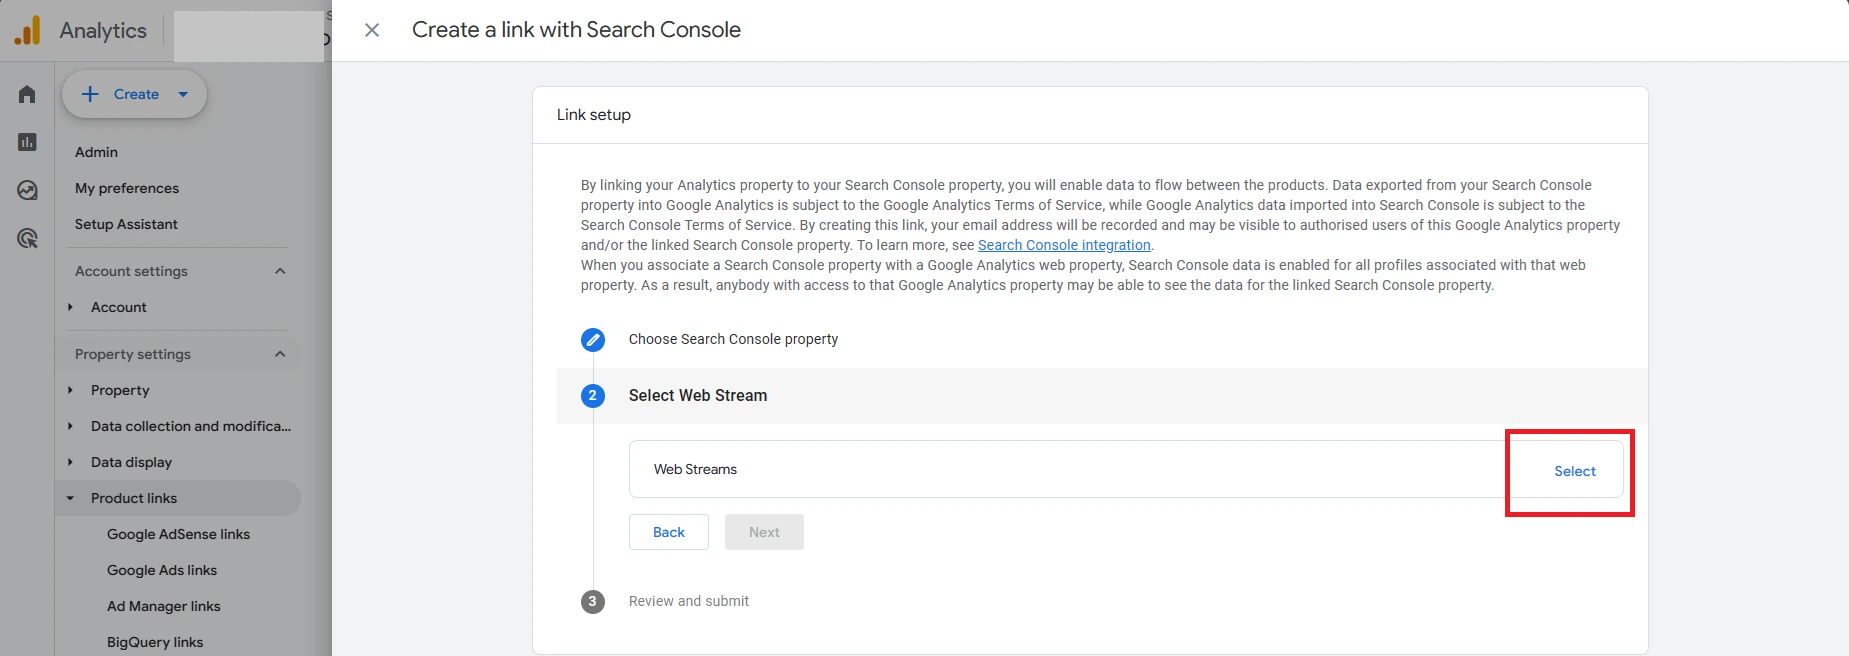
8. Click on the blog address you see in the data stream to select it.

9. Click on next to add it.
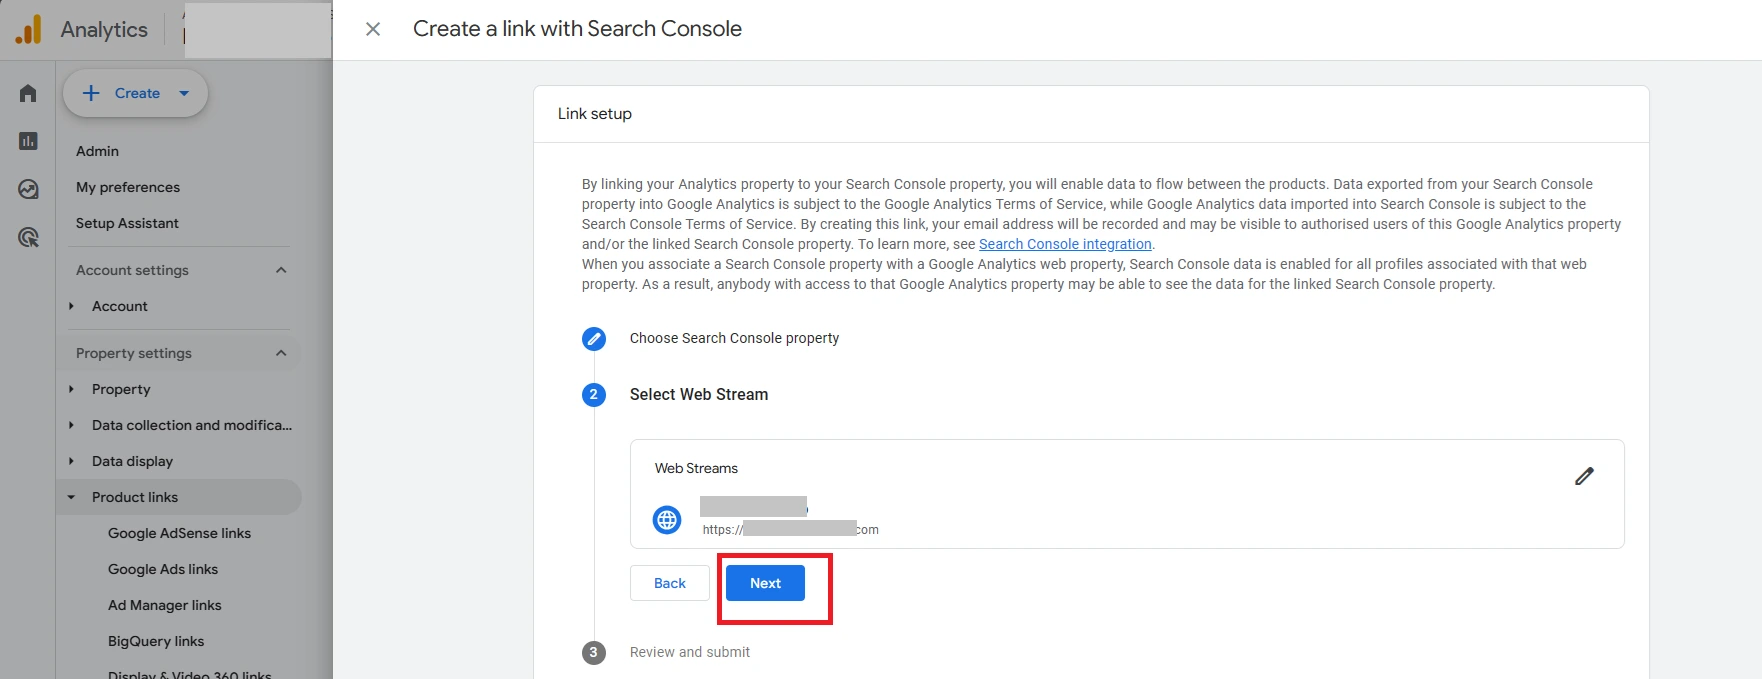
10. For step three, click on submit to link the two properties.
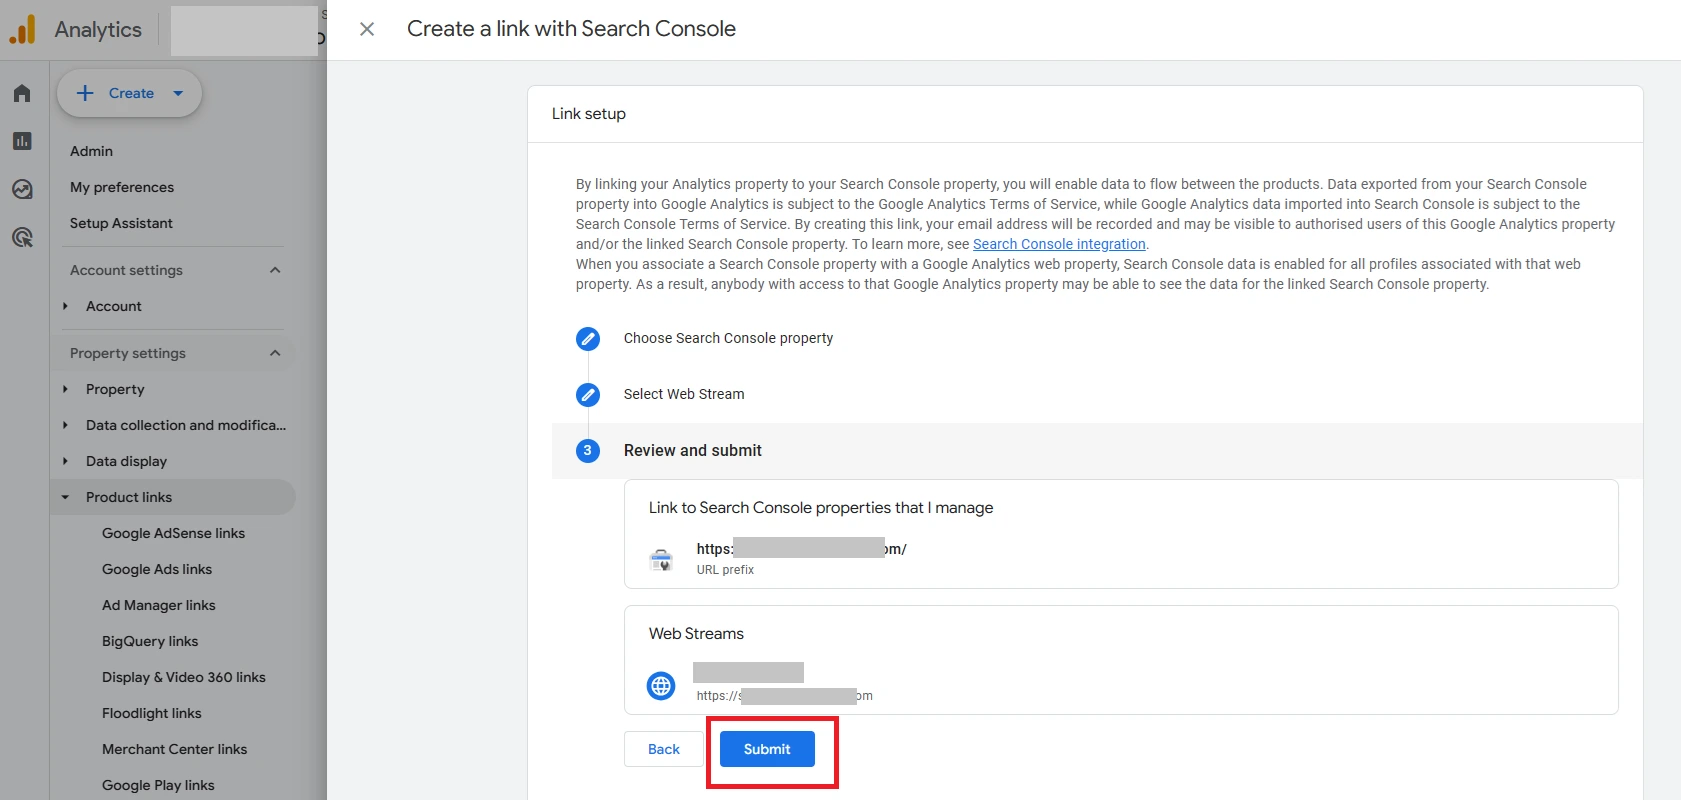
11. Well done. The Link is created. Close the page and go back to the Analytics home page.

You have successfully linked your Google Search Console to Google Analytics.
Want a more technical setup on Google Analytics? Watch the video here.
***
Now that you are done setting up Google Analytics for your blog, let’s go to the next steps.
Step 14: Choosing Your Monetizing Platform.
Step 15: Setting up Social Media Accounts for Your Blog.
Step 16: How to Drive Traffic to Your Blog.
***
Happy blogging…


