If you chose WordPress as the CMS you wish to use, here is how to install your WordPress.
Remember that from the post on connecting the domain name and hosting, we had the domain on Truehost and hosting on DomainKing. So you will be installing WordPress where your hosting is; in our case, DomainKing.
To do this, go to Services → My Services. On the hosting plan, click Active and go to the CPanel:
- From the CPanel, scroll down to Software → WordPress Manager by Softaculous.

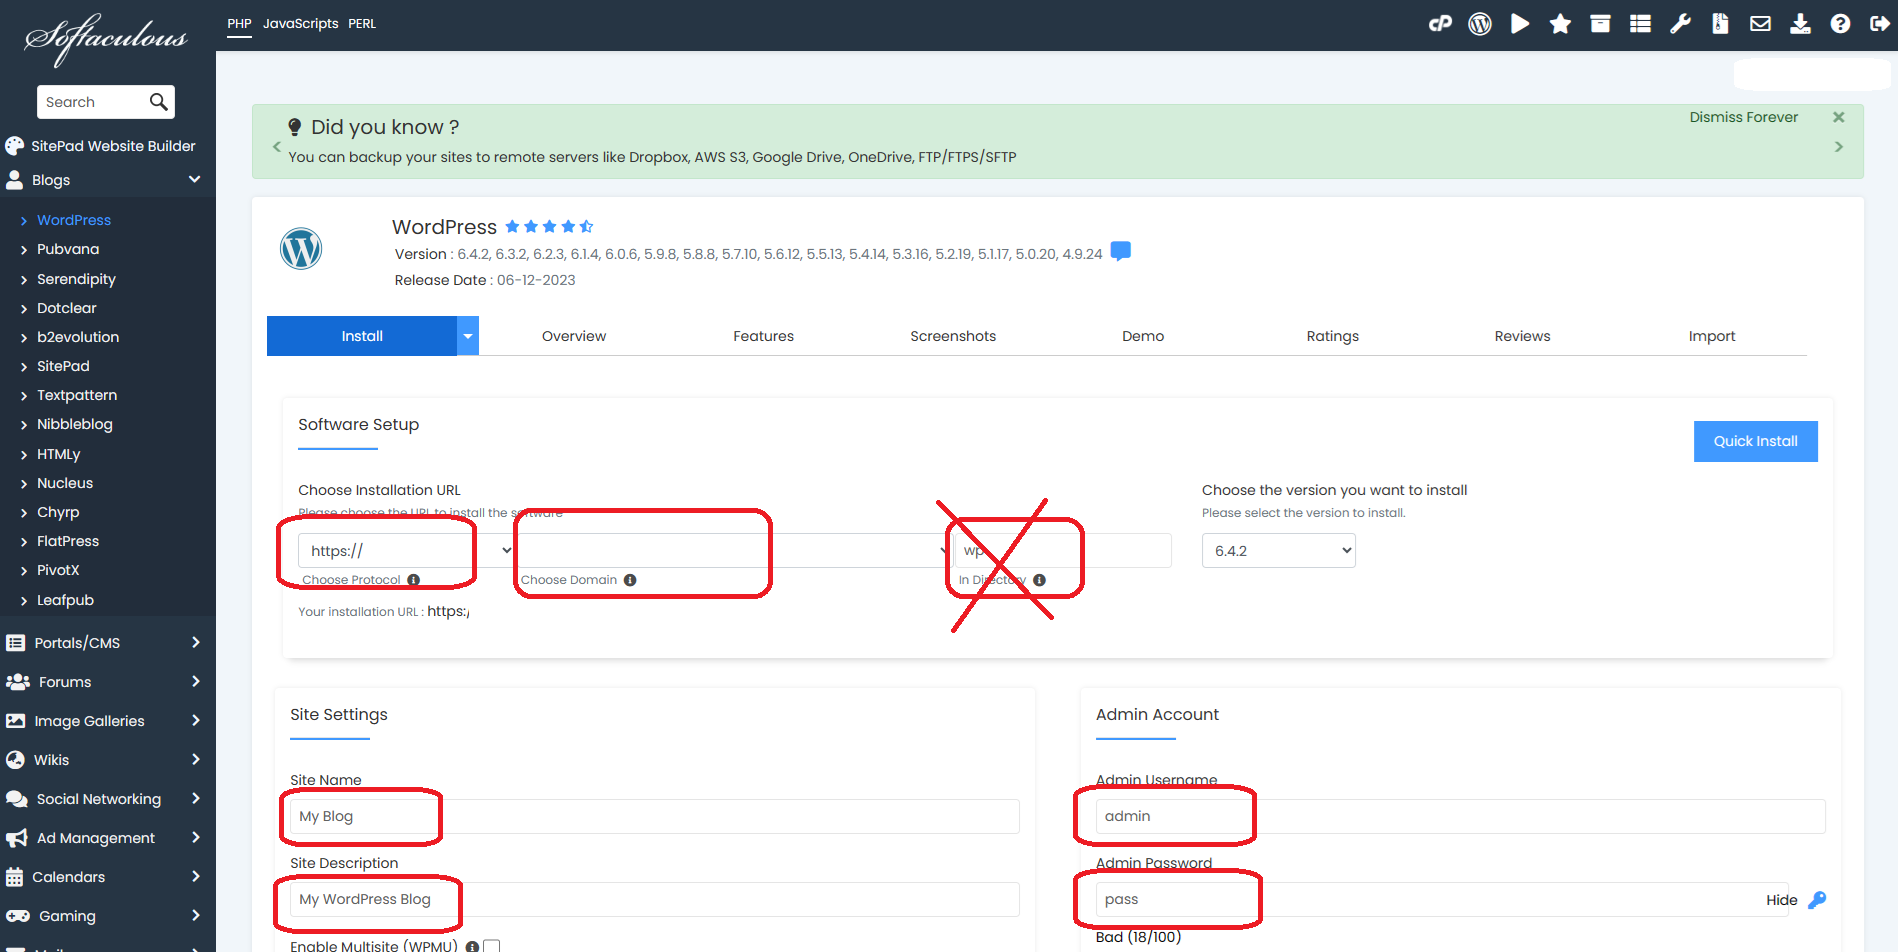
2. When it opens, Click on Install.

3. On the page, ensure that the chosen protocol is https://
4. Select the domain you are installing WordPress on. For example goodlooks.com.
5. Delete the “wp” in that box.

6. Enter your Site name, for example, “Good Looks“.
7. Enter your Site description, for example, “Looking good is our Business“.
8. Enter your Admin username. This is a name you do not want to share with anyone except you want a developer to work on your blog.
9. Enter your Admin password. Write the username and password in a place you can easily remember.

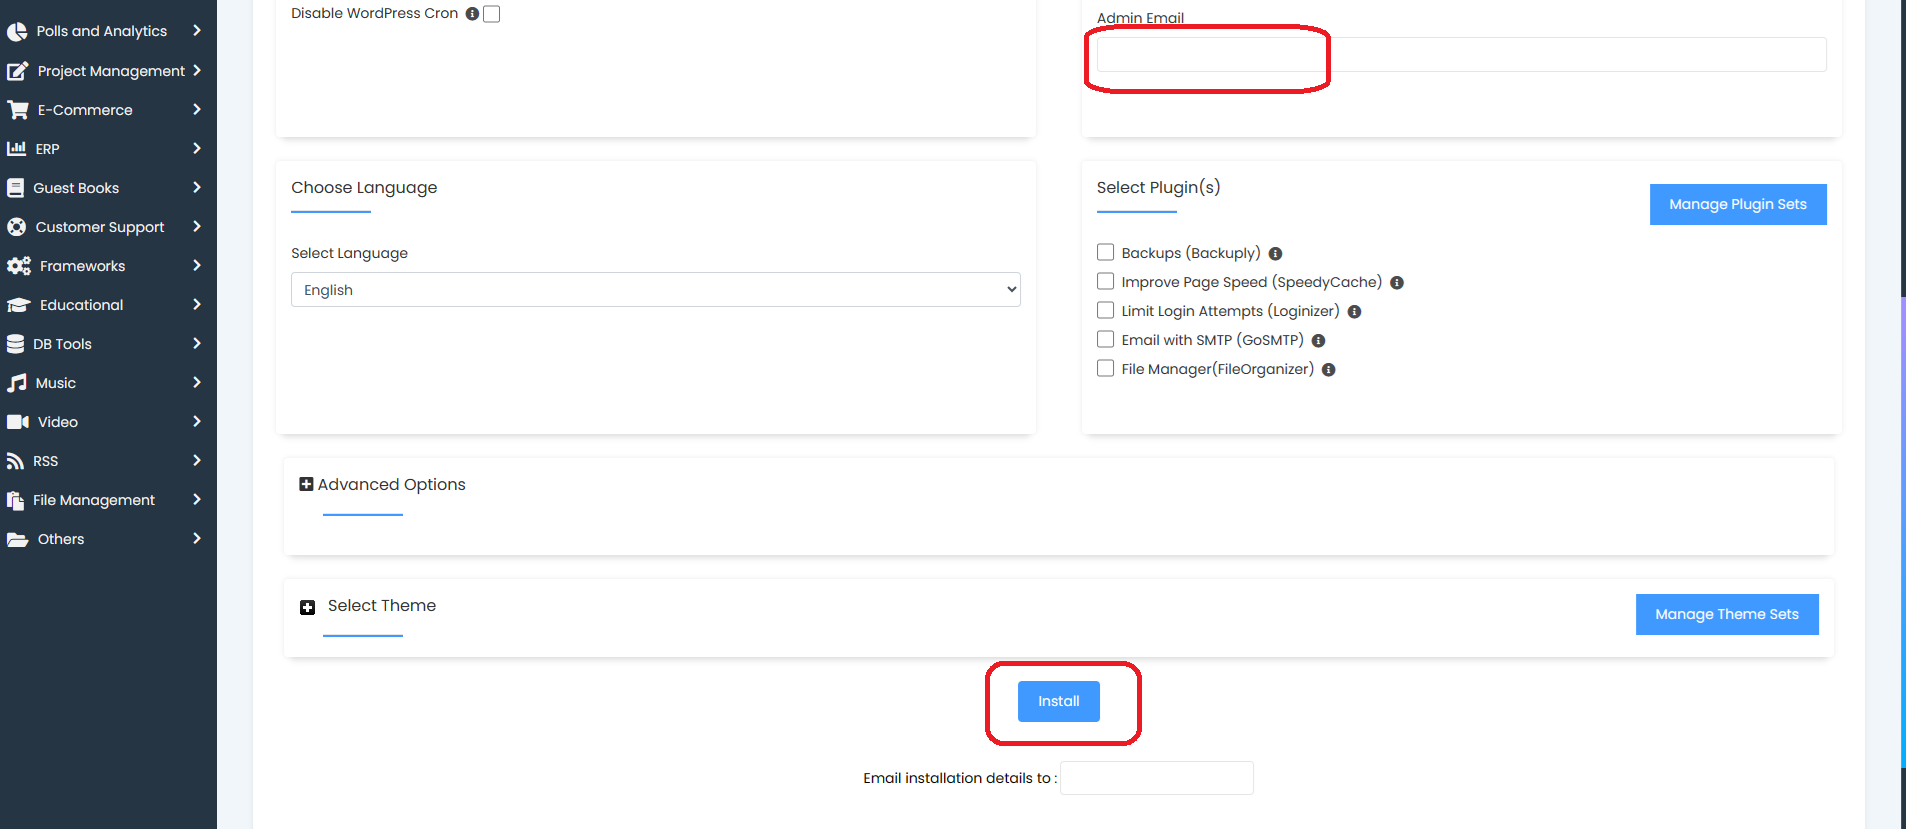
10. Enter your Admin email. This SHOULD NOT be an email you will post on your contact page. It should strictly be for admin login.
11. Click Install to install WordPress.
Once installation is complete, copy the URL shown to you. It should look like this “https://goodlooks.com/wp-admin” and paste it on another tab in your browser.
Log in with the admin username and password you created above.
That’s it. You have successfully installed WordPress on your domain.
***
Disclaimer: I do not have any affiliations with the domain name goodlooks.com. It was merely used for explanation purposes.
***
Now that you know how to install your WordPress, let’s go to the next steps.
Step 7: How to Set up WordPress as your CMS.
Step 8: Install Your Blog Theme.
Step 9: Add Relevant Plugins.
***
Happy blogging…


